Manage and share your invoices in a few simple steps
Go to the "Invoices" section
Open the WAY-Partner application.
From the menu at the bottom of the screen, press "Invoices".

Select a job to invoice
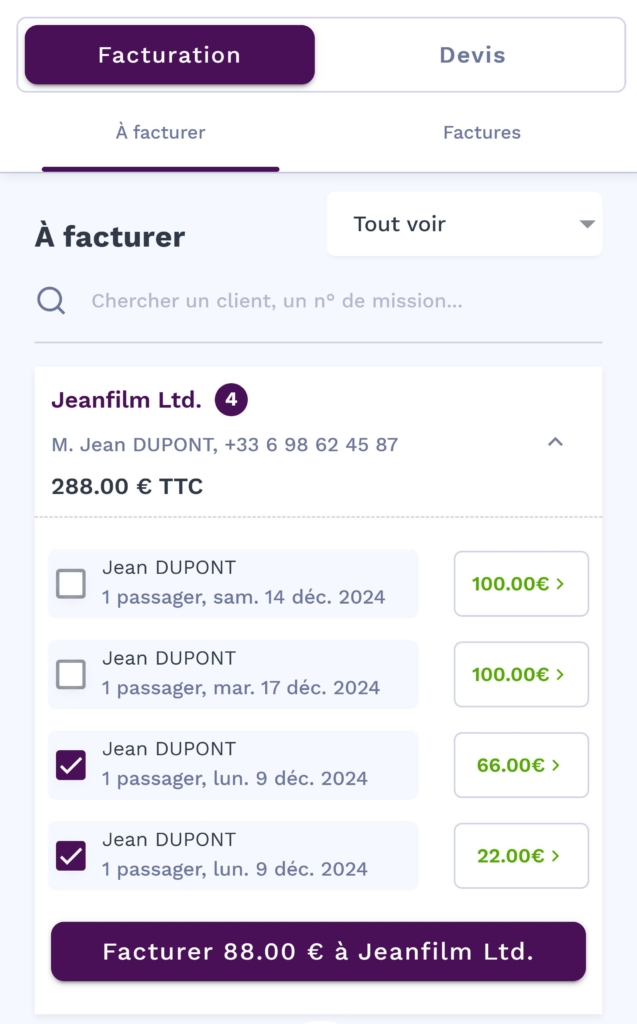
In the "To be billed" tab, you will see a list of assignments awaiting billing.
Search for the assignment you wish to invoice.
You can select a single assignment or several by ticking the associated boxes.
Check that the information is correct (amount including VAT, details of the assignment, additional costs, etc.).
Important: The jobs to be invoiced are sorted by customer, which means that it is only possible to select several jobs for the same customer.

Generate invoice
Press the "Bill" button at the bottom of the screen.
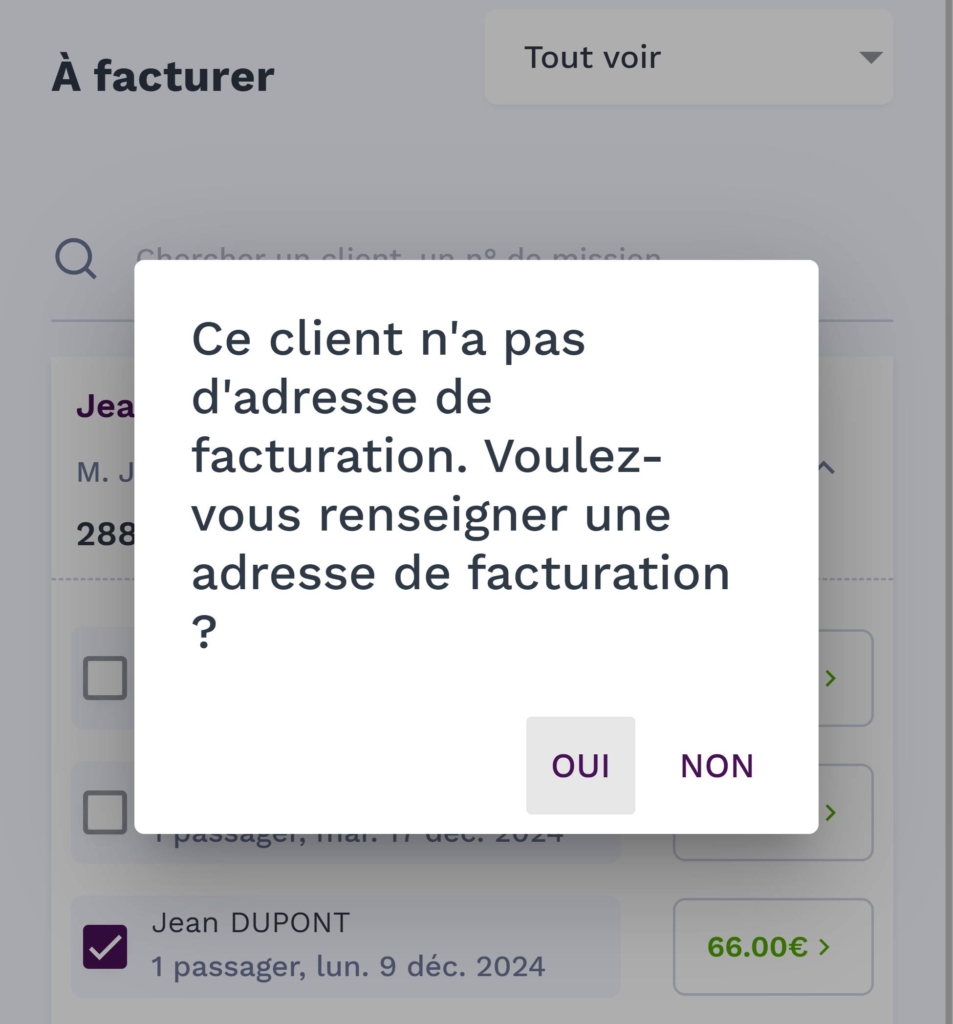
If a billing address is missing, the application will ask you to enter it. Fill in the necessary information, then confirm.
Once the invoice has been generated, you will be automatically redirected to the 'Invoices' tab, where the invoice will appear.

Download and share the invoice
Once generated, the invoice appears in the "Invoices" tab.
Press "Invoice" to access its details and download it.
Use your device's sharing system (WhatsApp, e-mail, etc.) to send the invoice to your customers.
Once the bill has been settled, press "Settled bill" to update it.
Important: WAY-Partner does not manage the sending of e-mails directly.

Advice
Make sure that your billing information is entered correctly before sending the invoice.
You can download a PDF copy of the invoice directly from the application for your archives.
Here is an example of an invoice
Once the invoice has been paid, you can update it directly in the application to keep things clear and organised.
Do you have any questions? Our support team is here to help you every step of the way!


